Submitting data for a different type of inspection? View documentation here.
These steps start after you have created an Instant Inspection order.
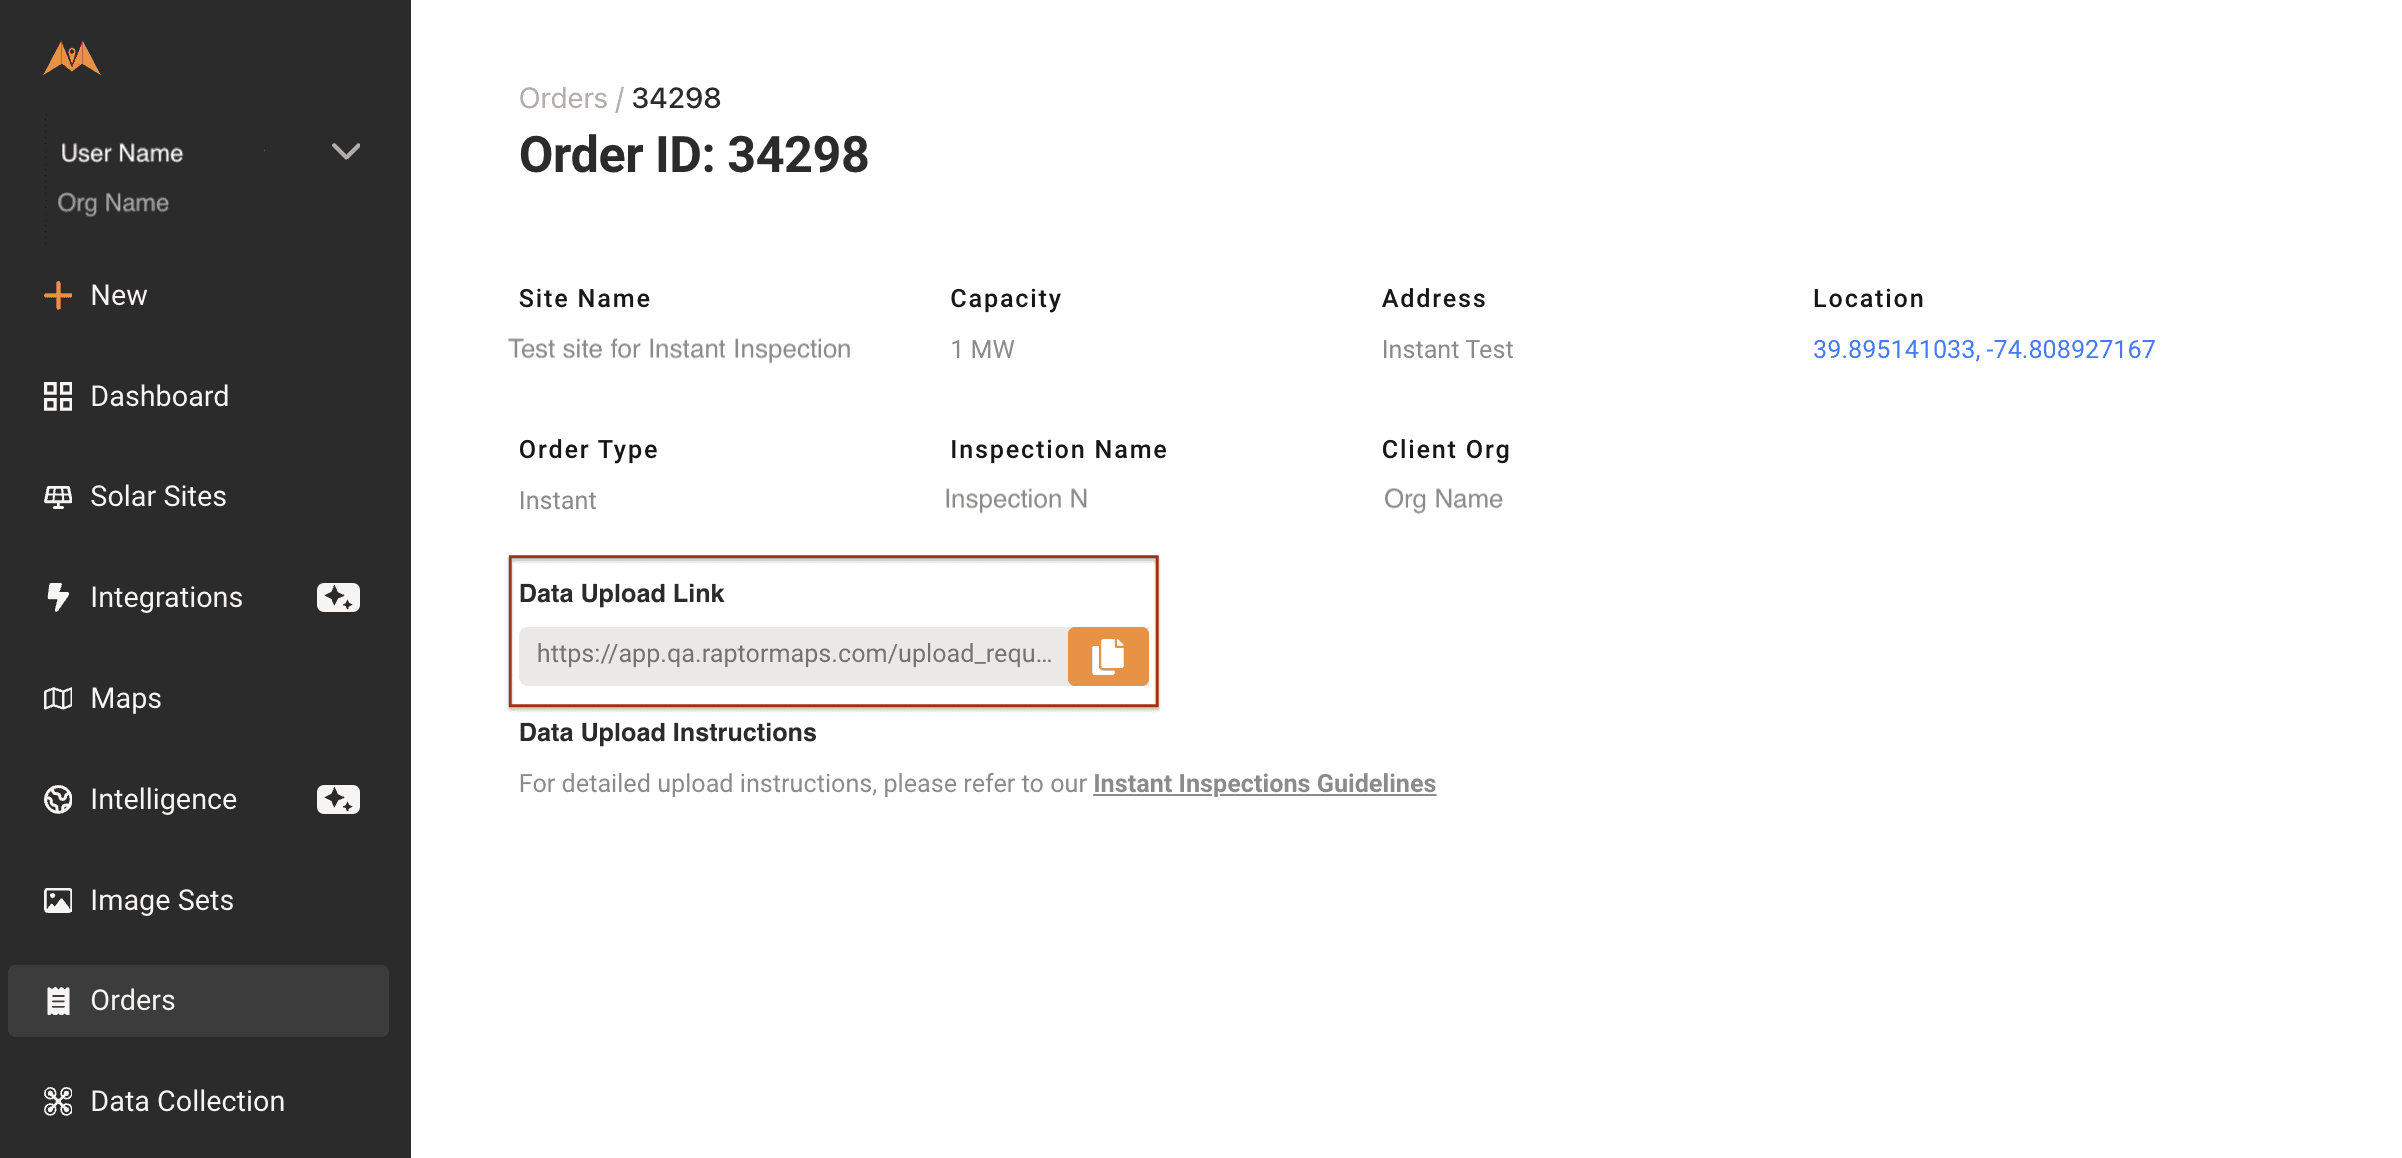
Step 1: How to get the data upload link
Copy the upload link found in your order and paste it in another browser window to open it.
- A note about obliques -
Obliques must be uploaded and submitted separately from other Instant Inspection imagery
Click “This upload contains obliques” before starting the obliques upload
Step 2: How to upload inspection images
5G data connectivity or WiFi connection is recommended on-site for speedy transfer.
You can add images from a folder on your desktop by clicking click to upload, or you can drag-and-drop your images into the upload box.
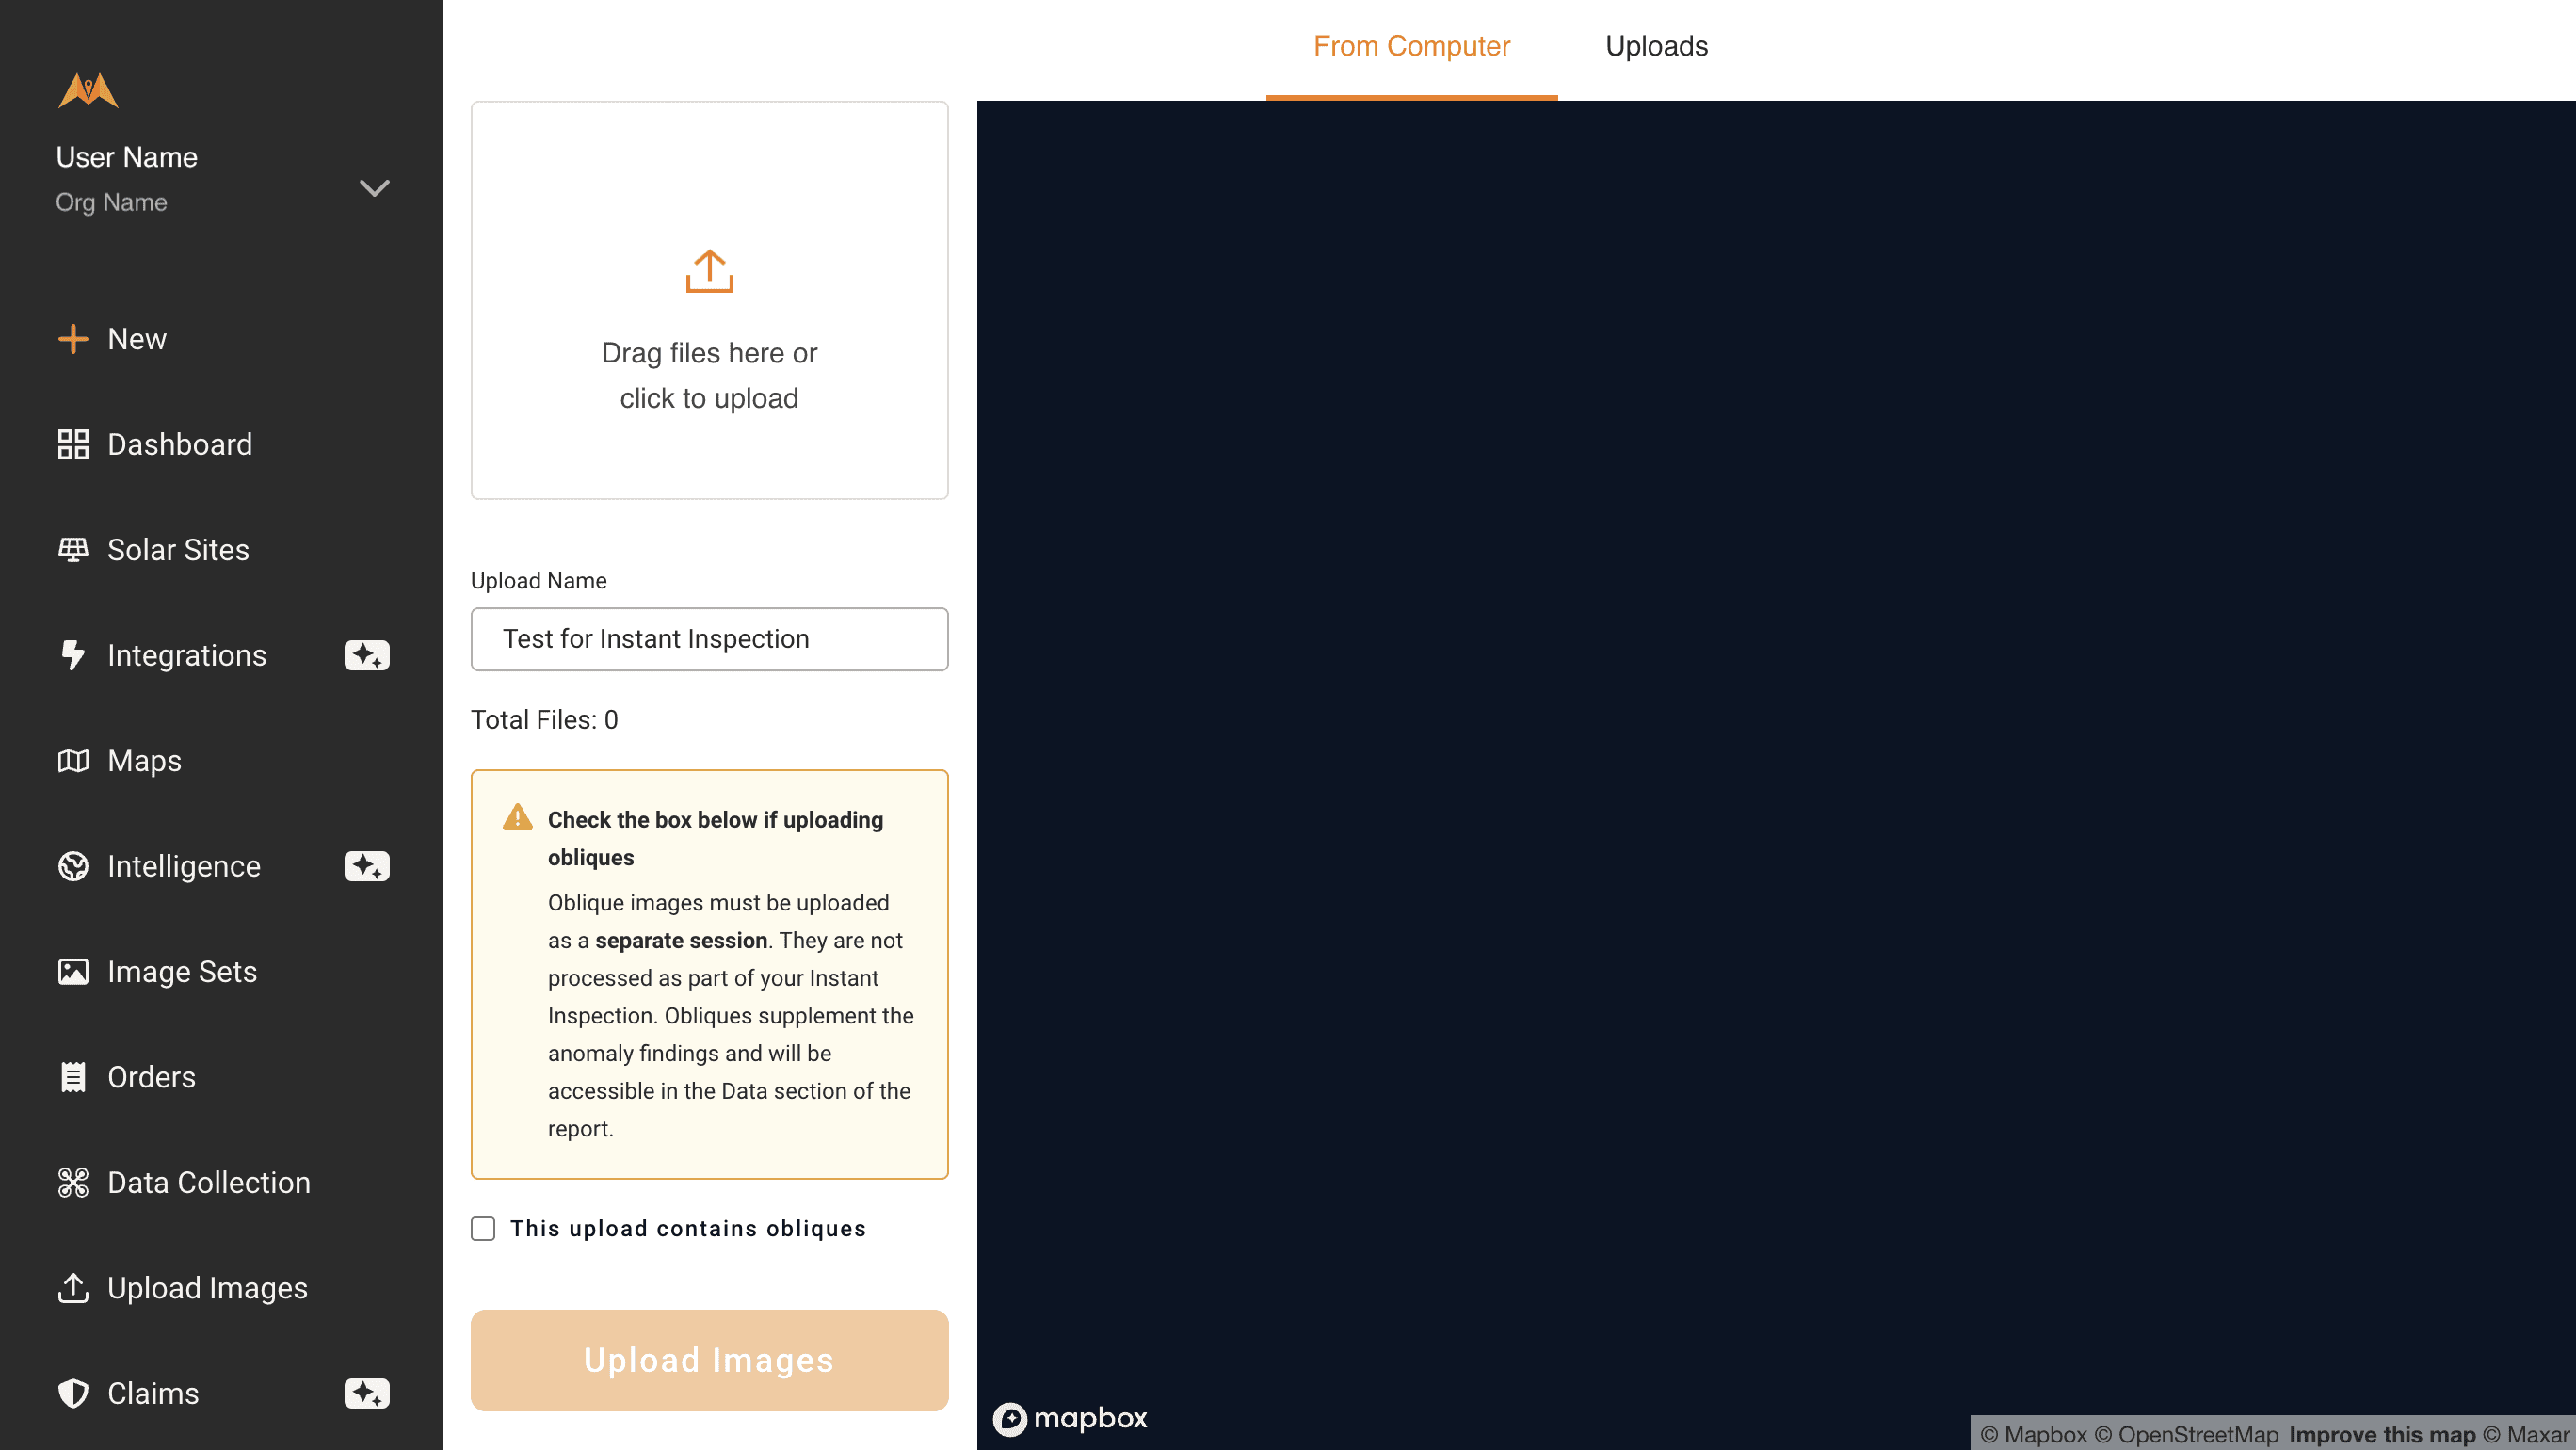
Name the upload session (e.g. a combination of inspection name and inspection date) or a descriptive name easier to refer (e.g. “Northwest Block”).
This name will not appear in the report, but is useful for next steps in creating image sets.
Review the imagery by scanning the GPS pins to confirm they appropriately cover the site with at least one row of buffer on all sides of the arrays.
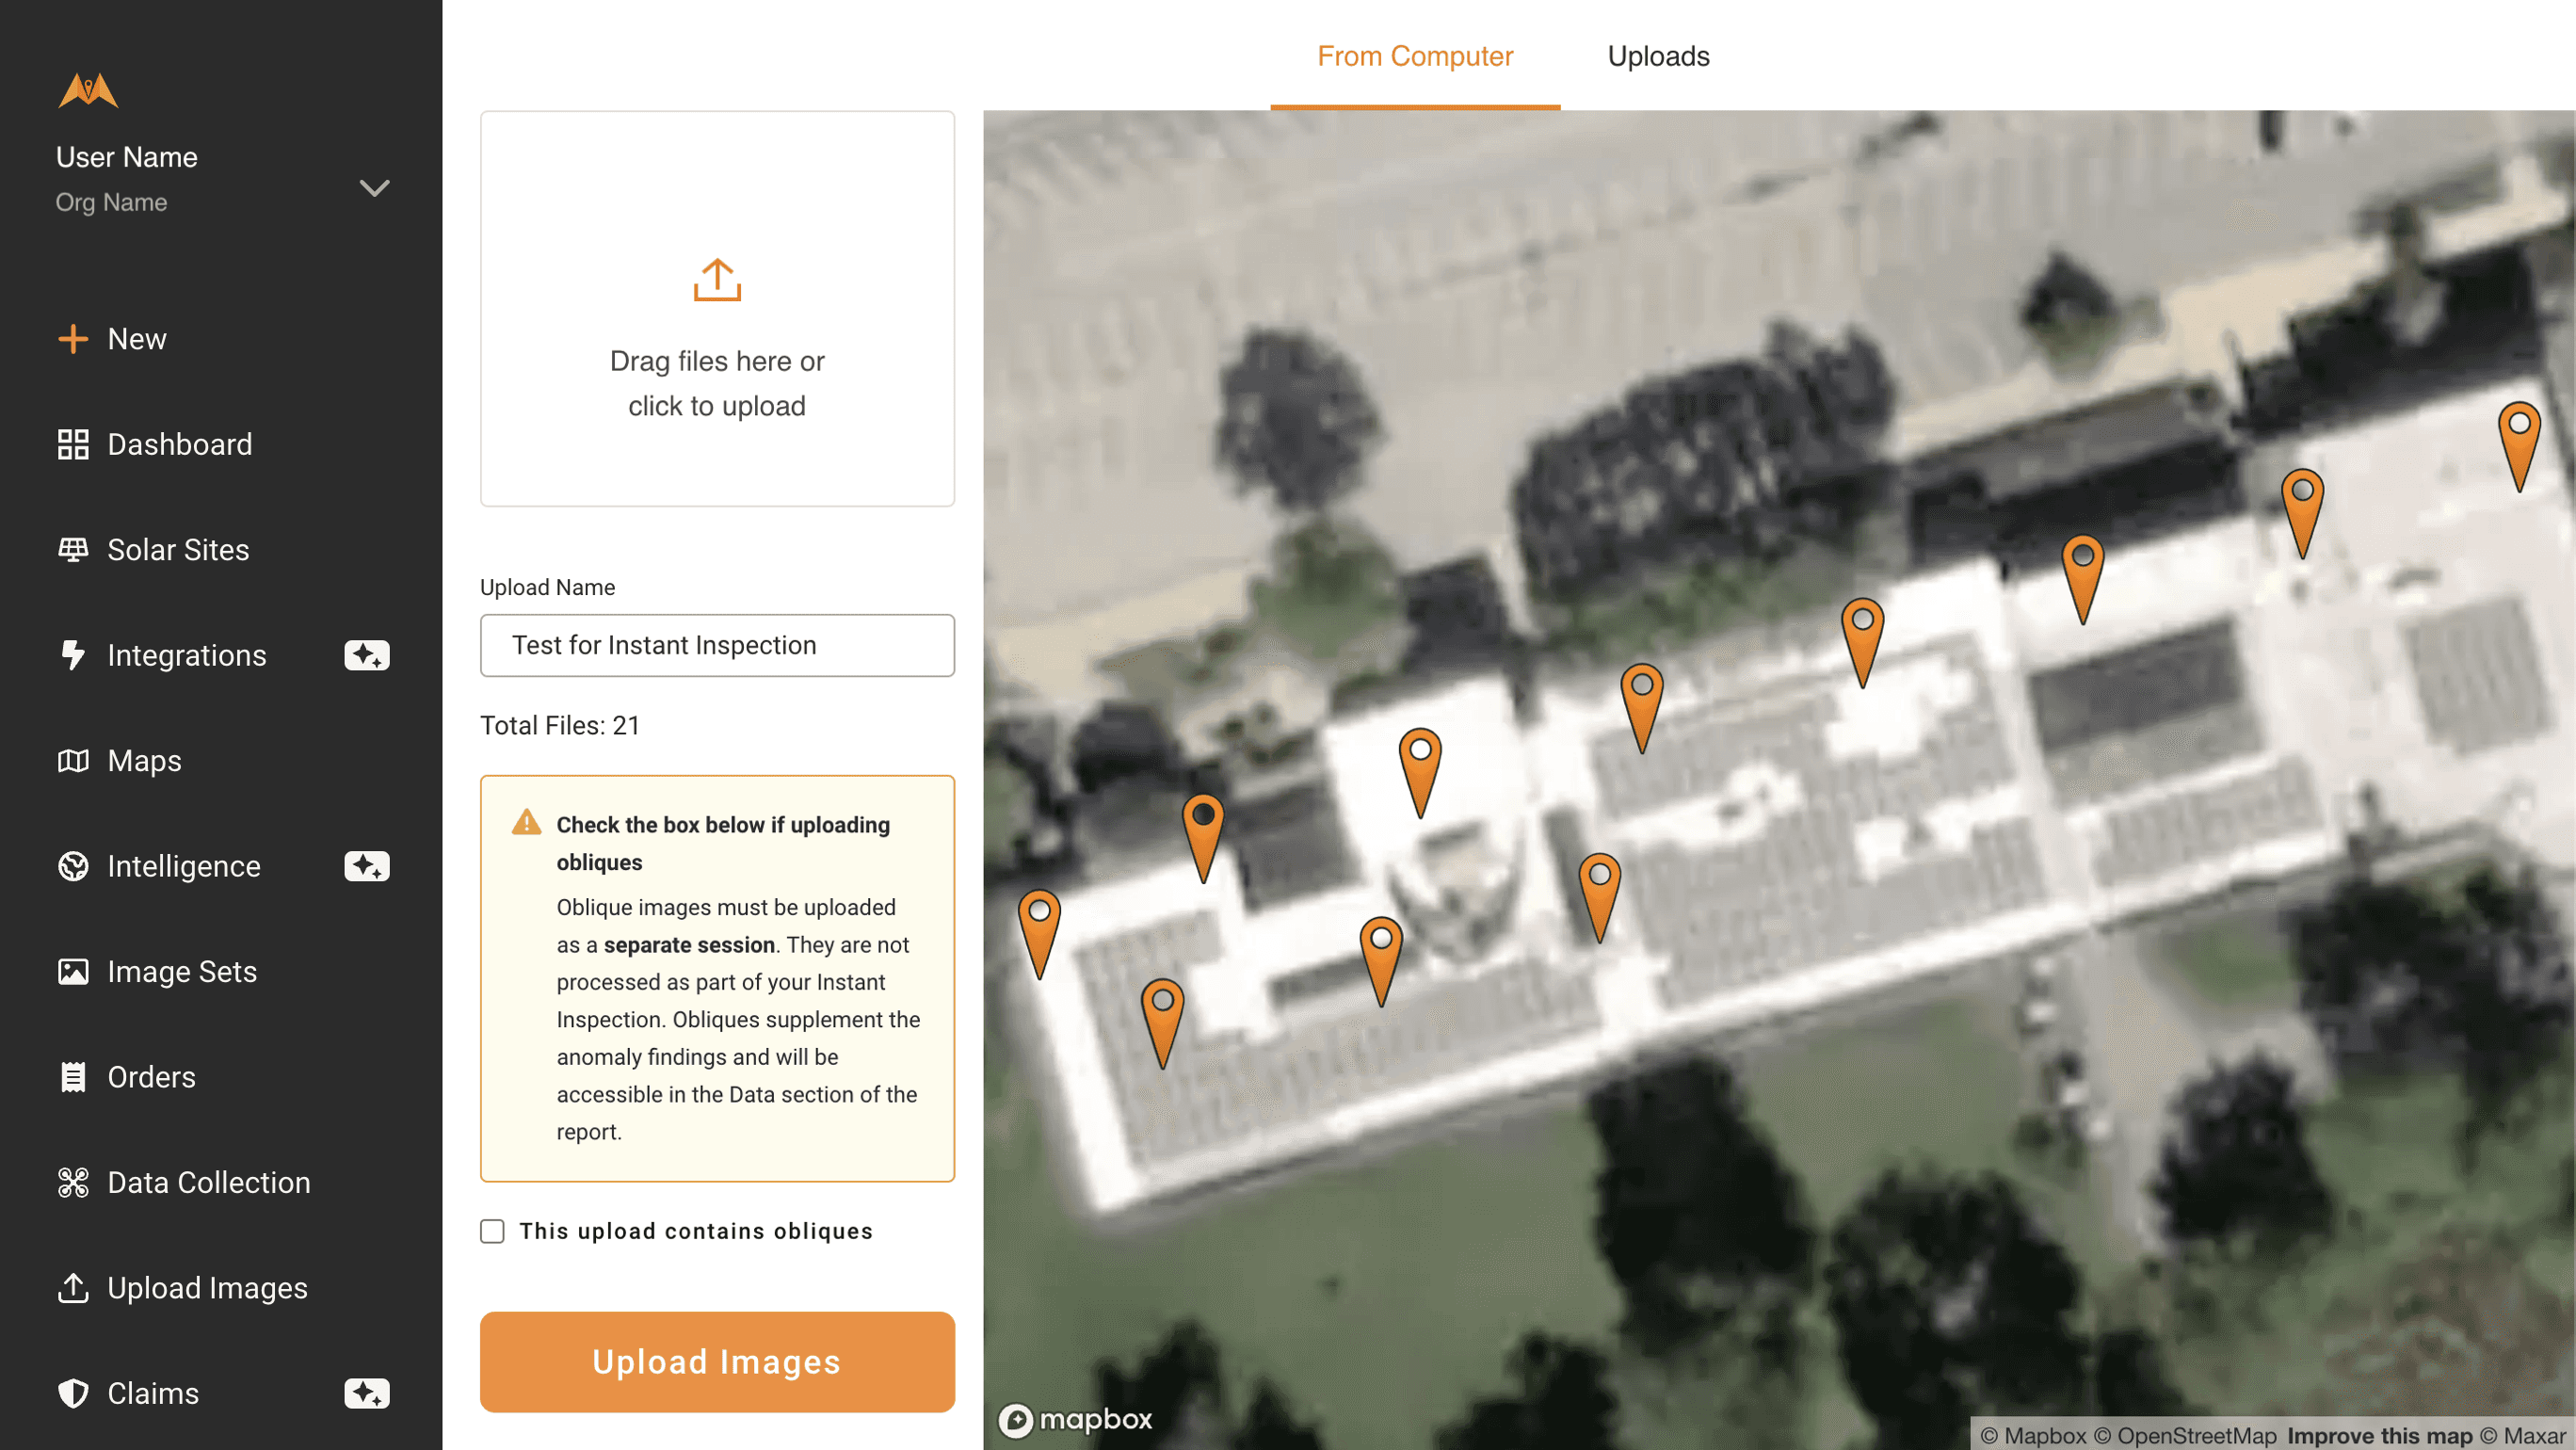
Click on Upload Images to start the upload process.
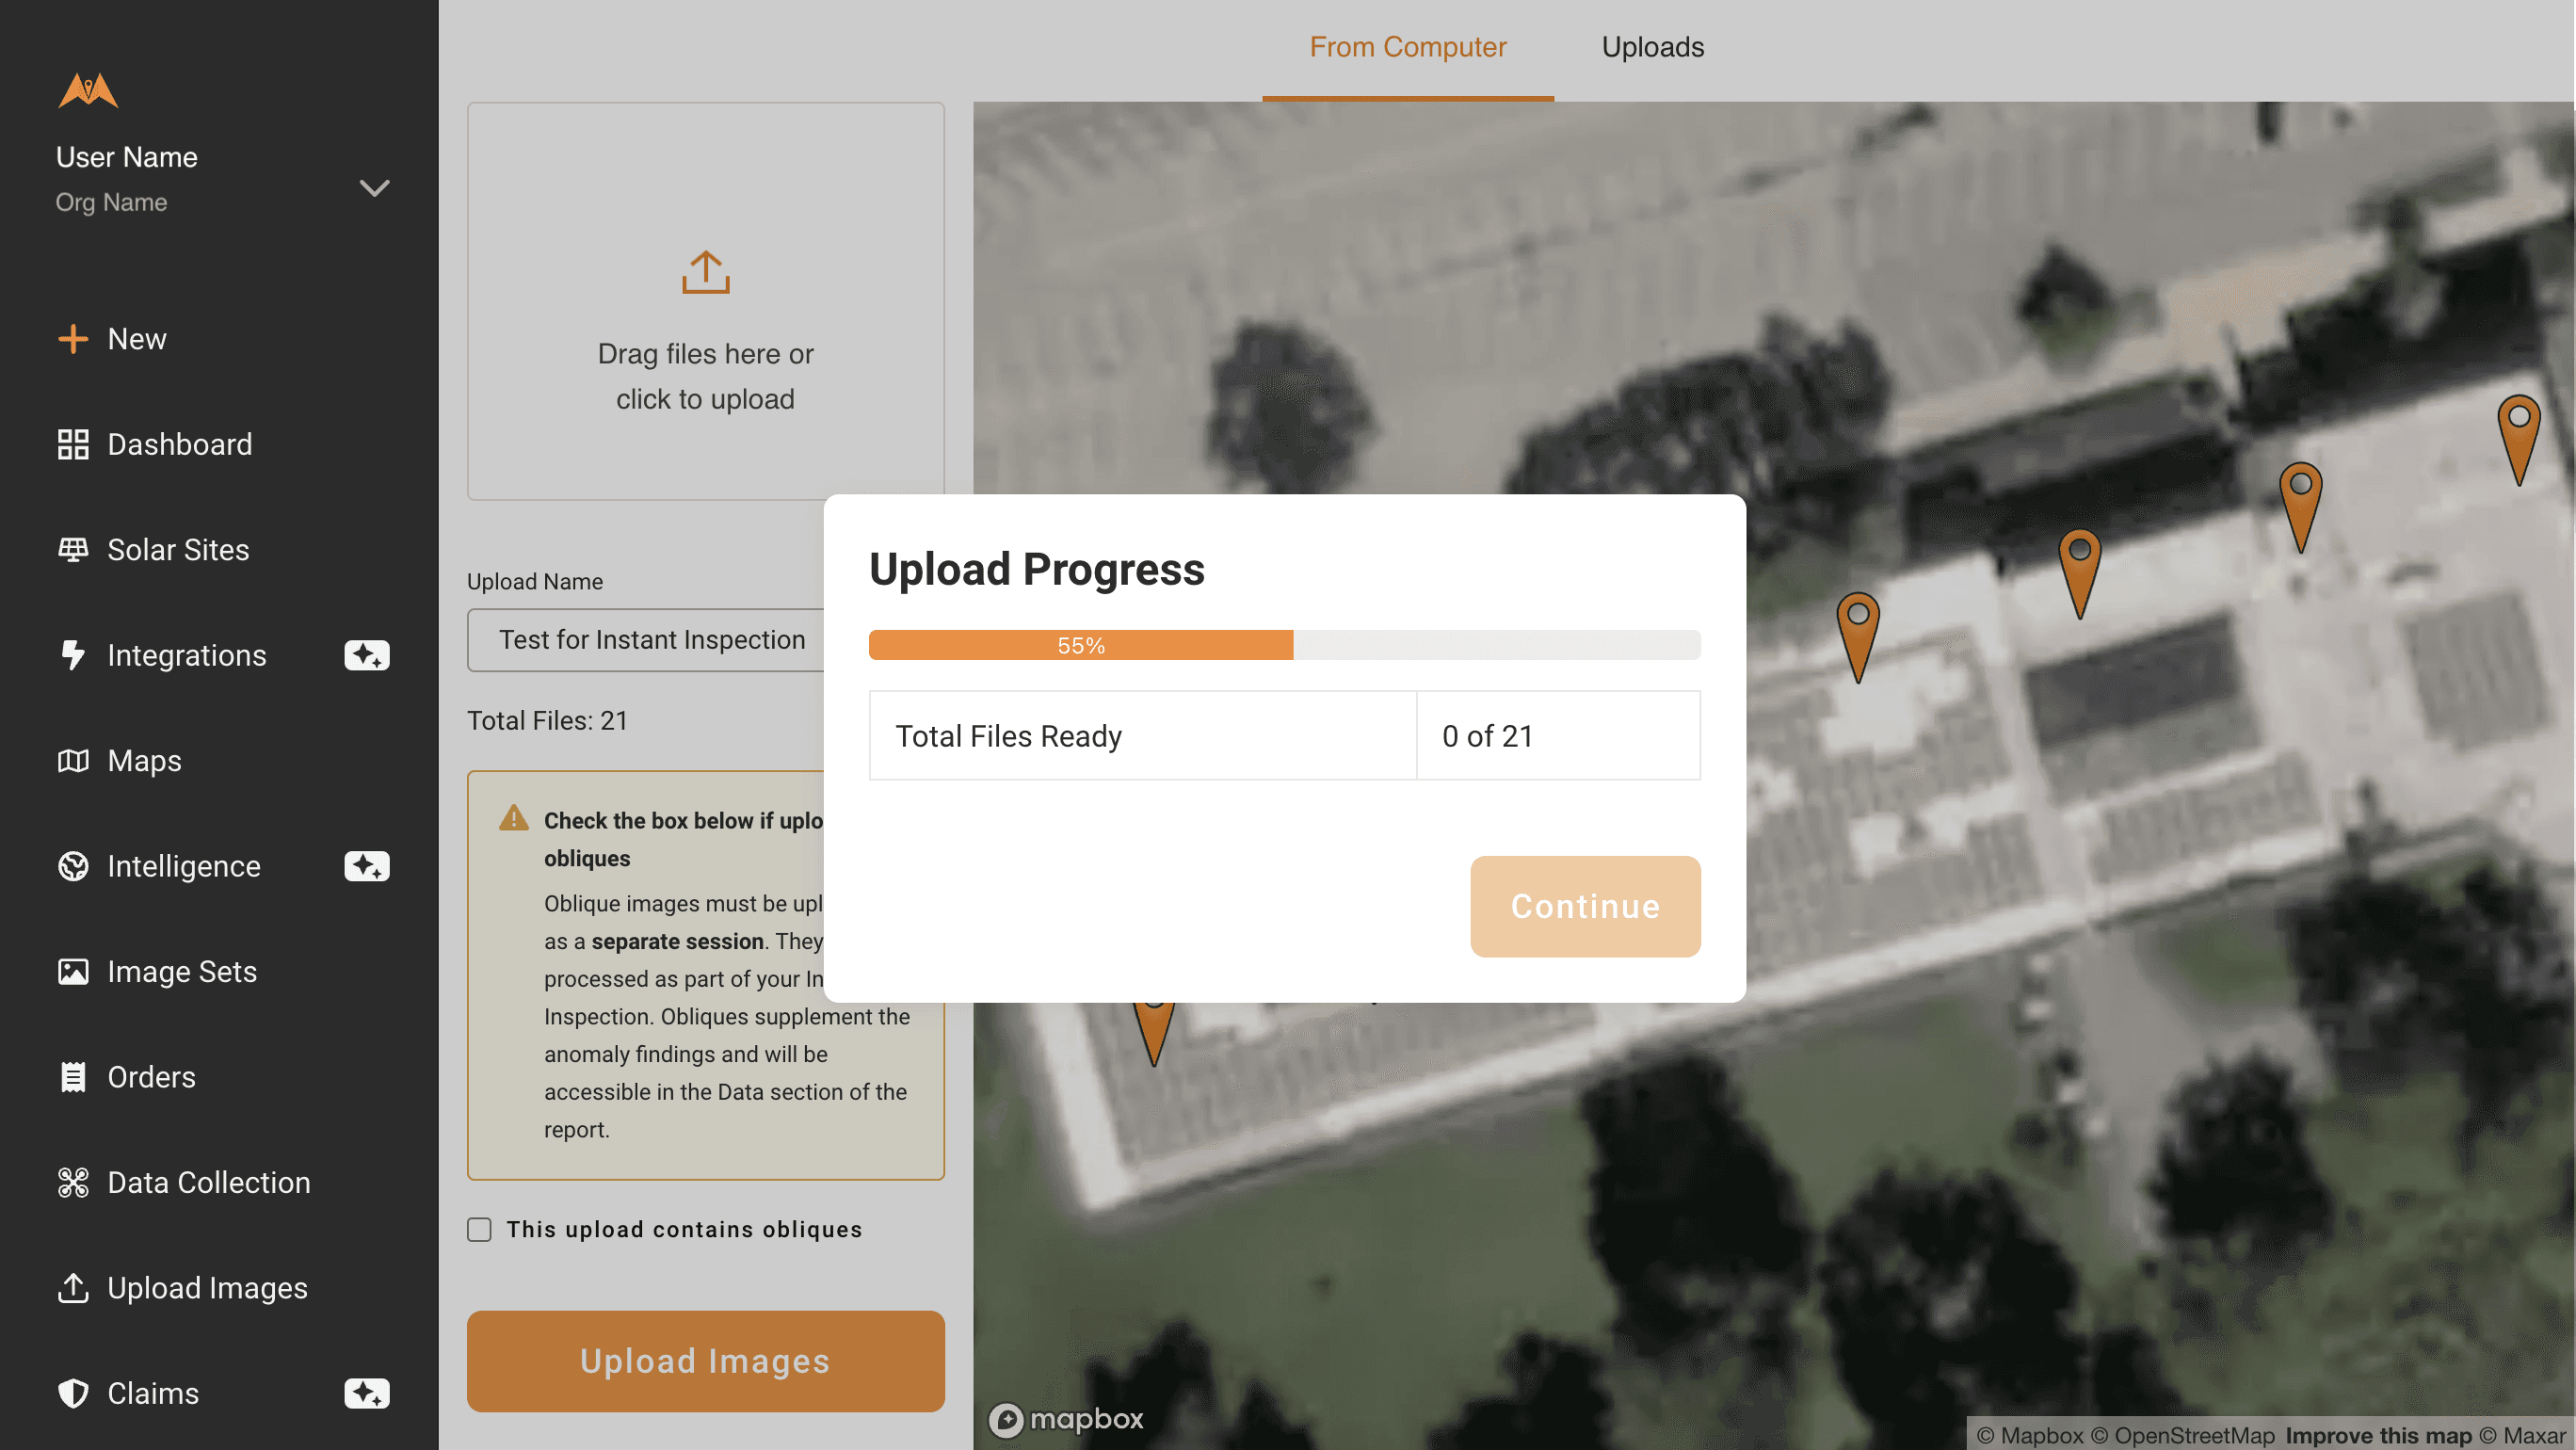
During upload, you can navigate to other browser windows or tabs, but do not close this tab until the upload is complete.
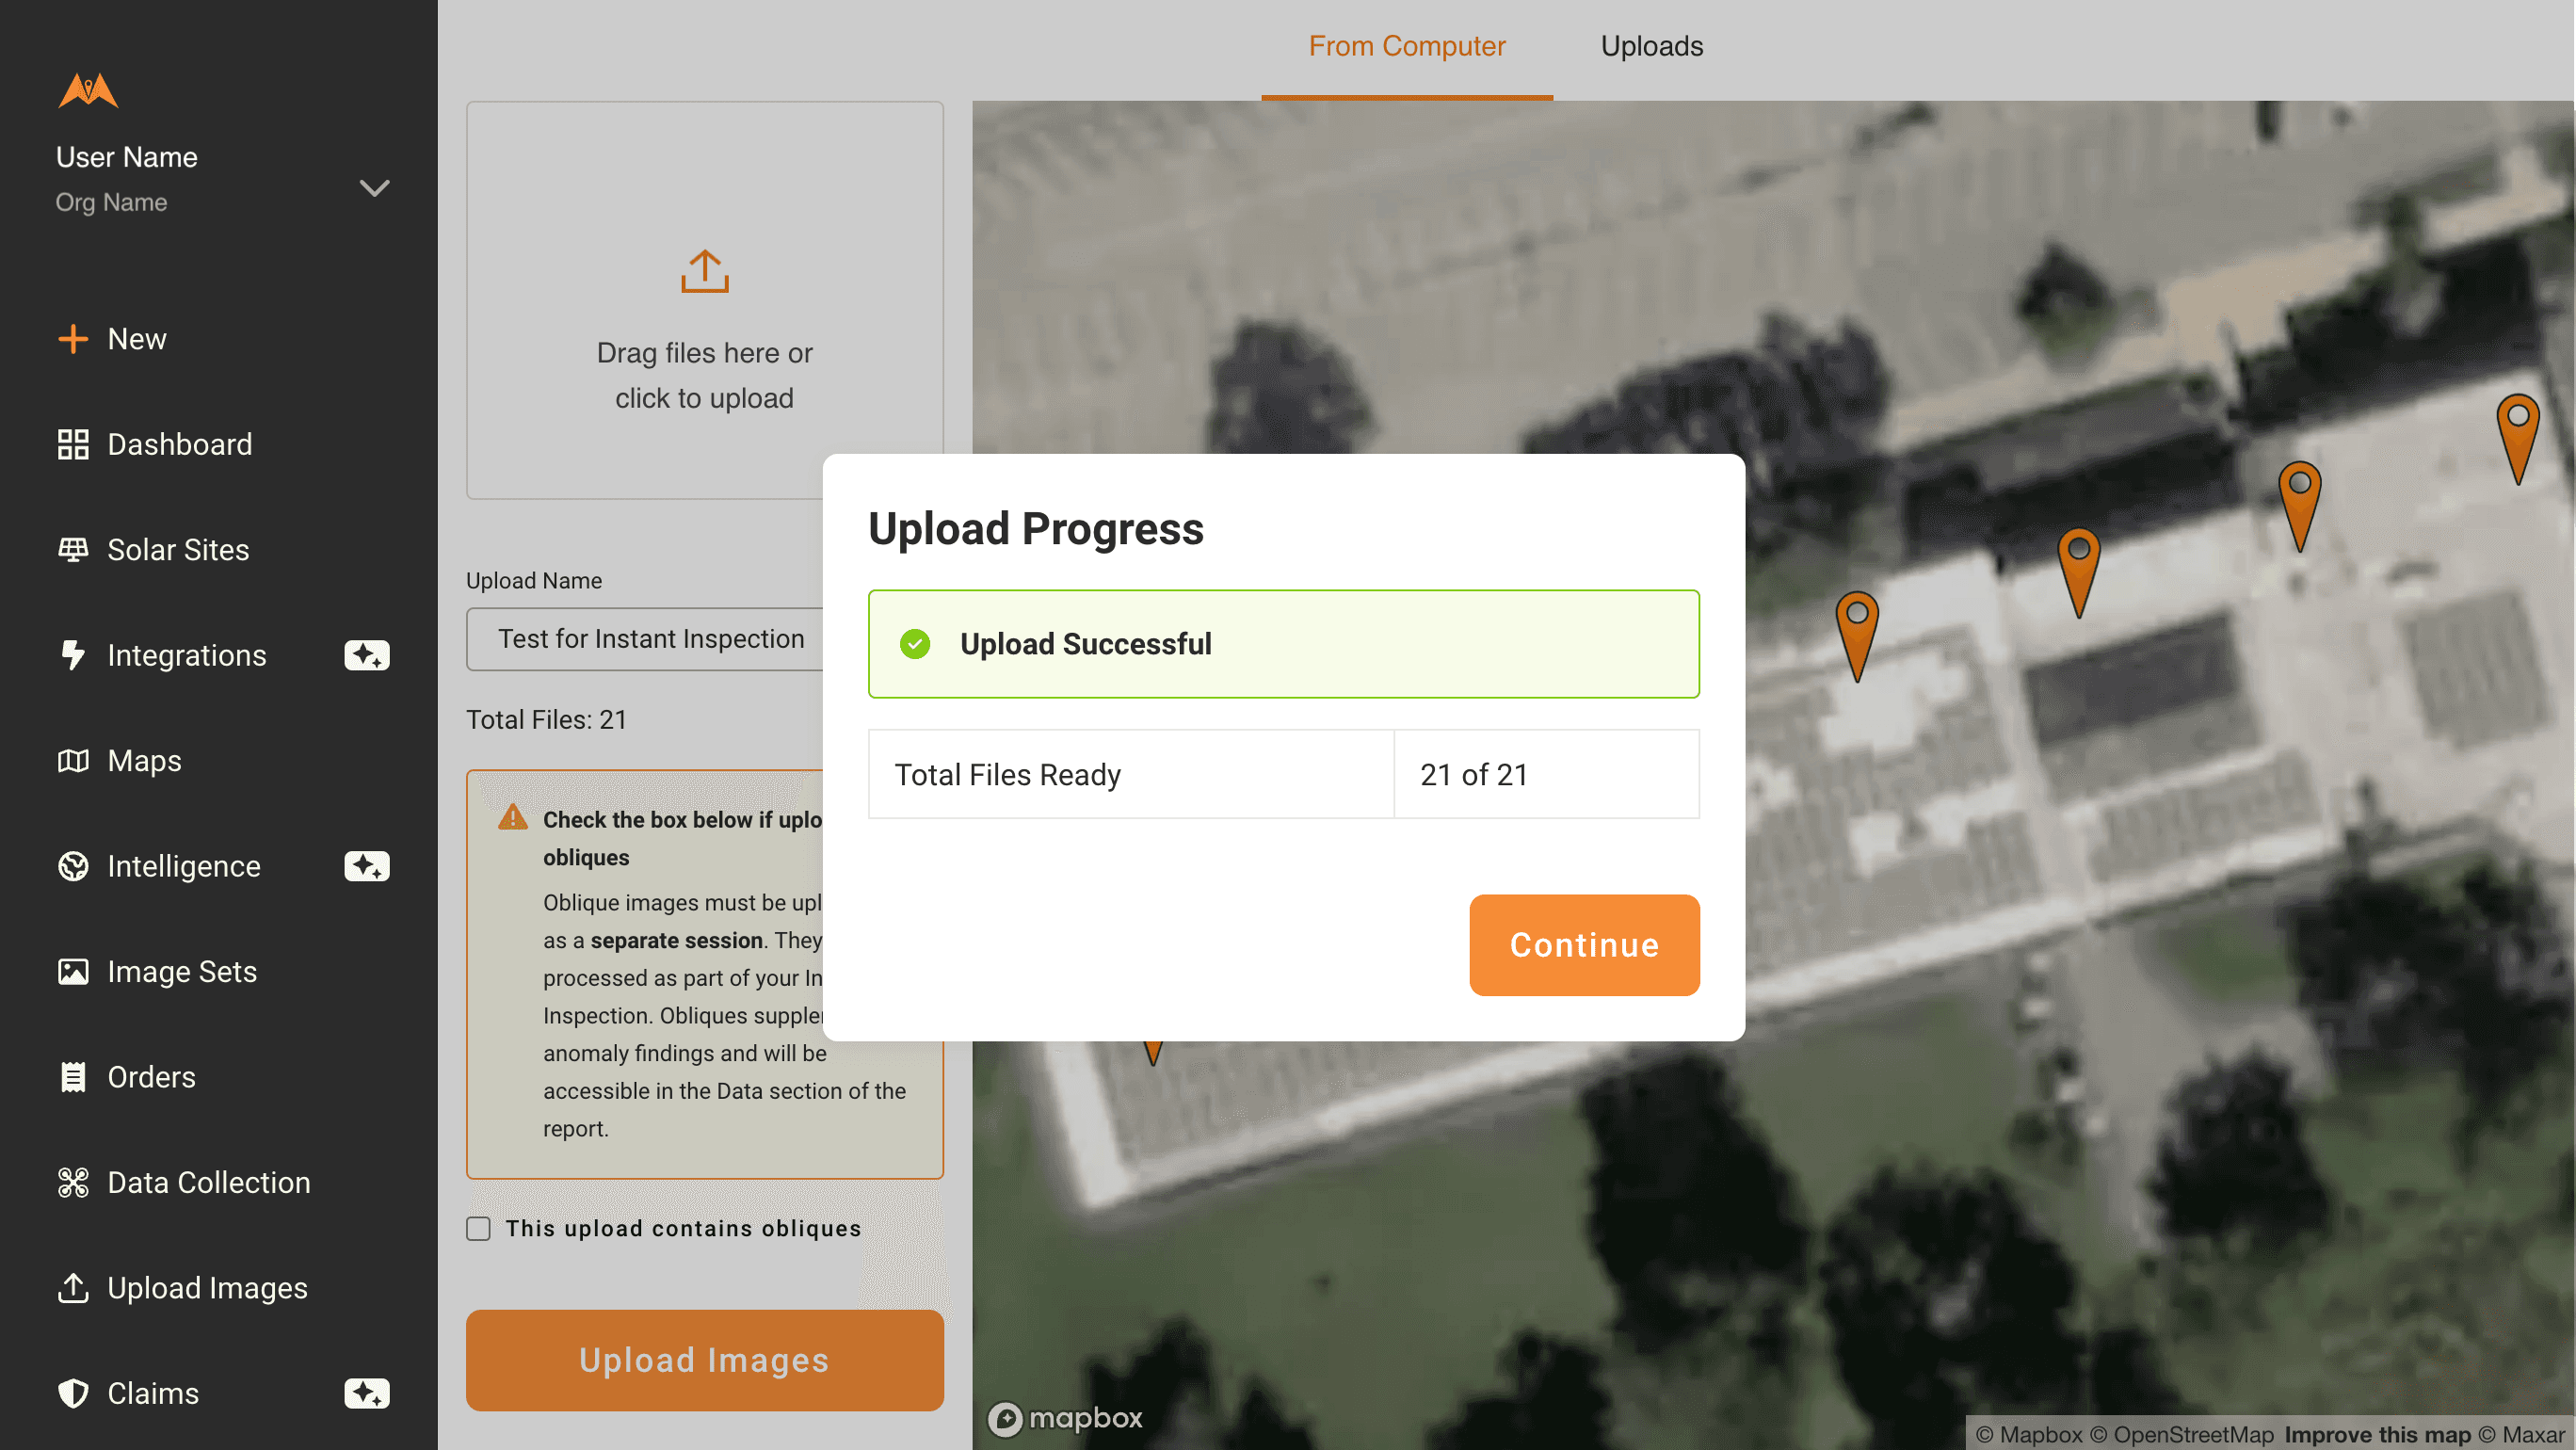
Click Continue
This button will be active once the images have successfully uploaded.
Step 3: How to submit images for processing
Click Continue
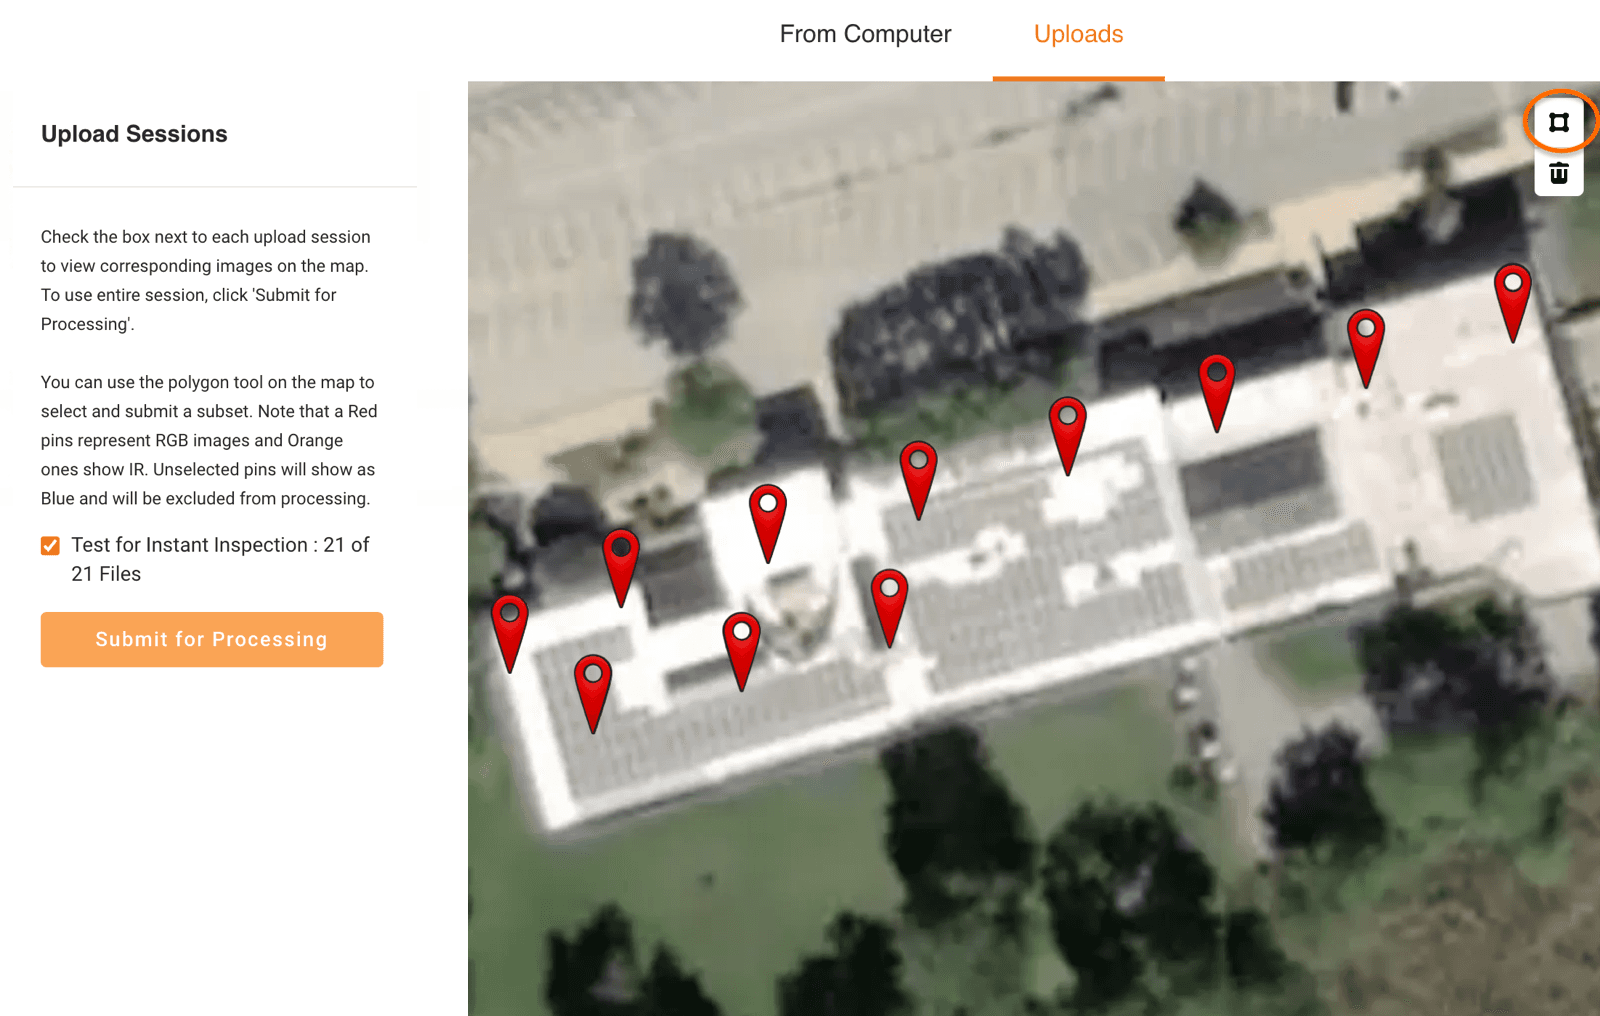
Click the Uploads tab of the page - this is where you can see all of the data that has been uploaded
Select the upload that you want to submit for processing
Images corresponding to the Upload will be shown as pins on the map at the location they were captured. Orange pins represent IR images and red ones RGB. Note that since both IR and RGB images are captured at the same time, one may be hidden behind the other.
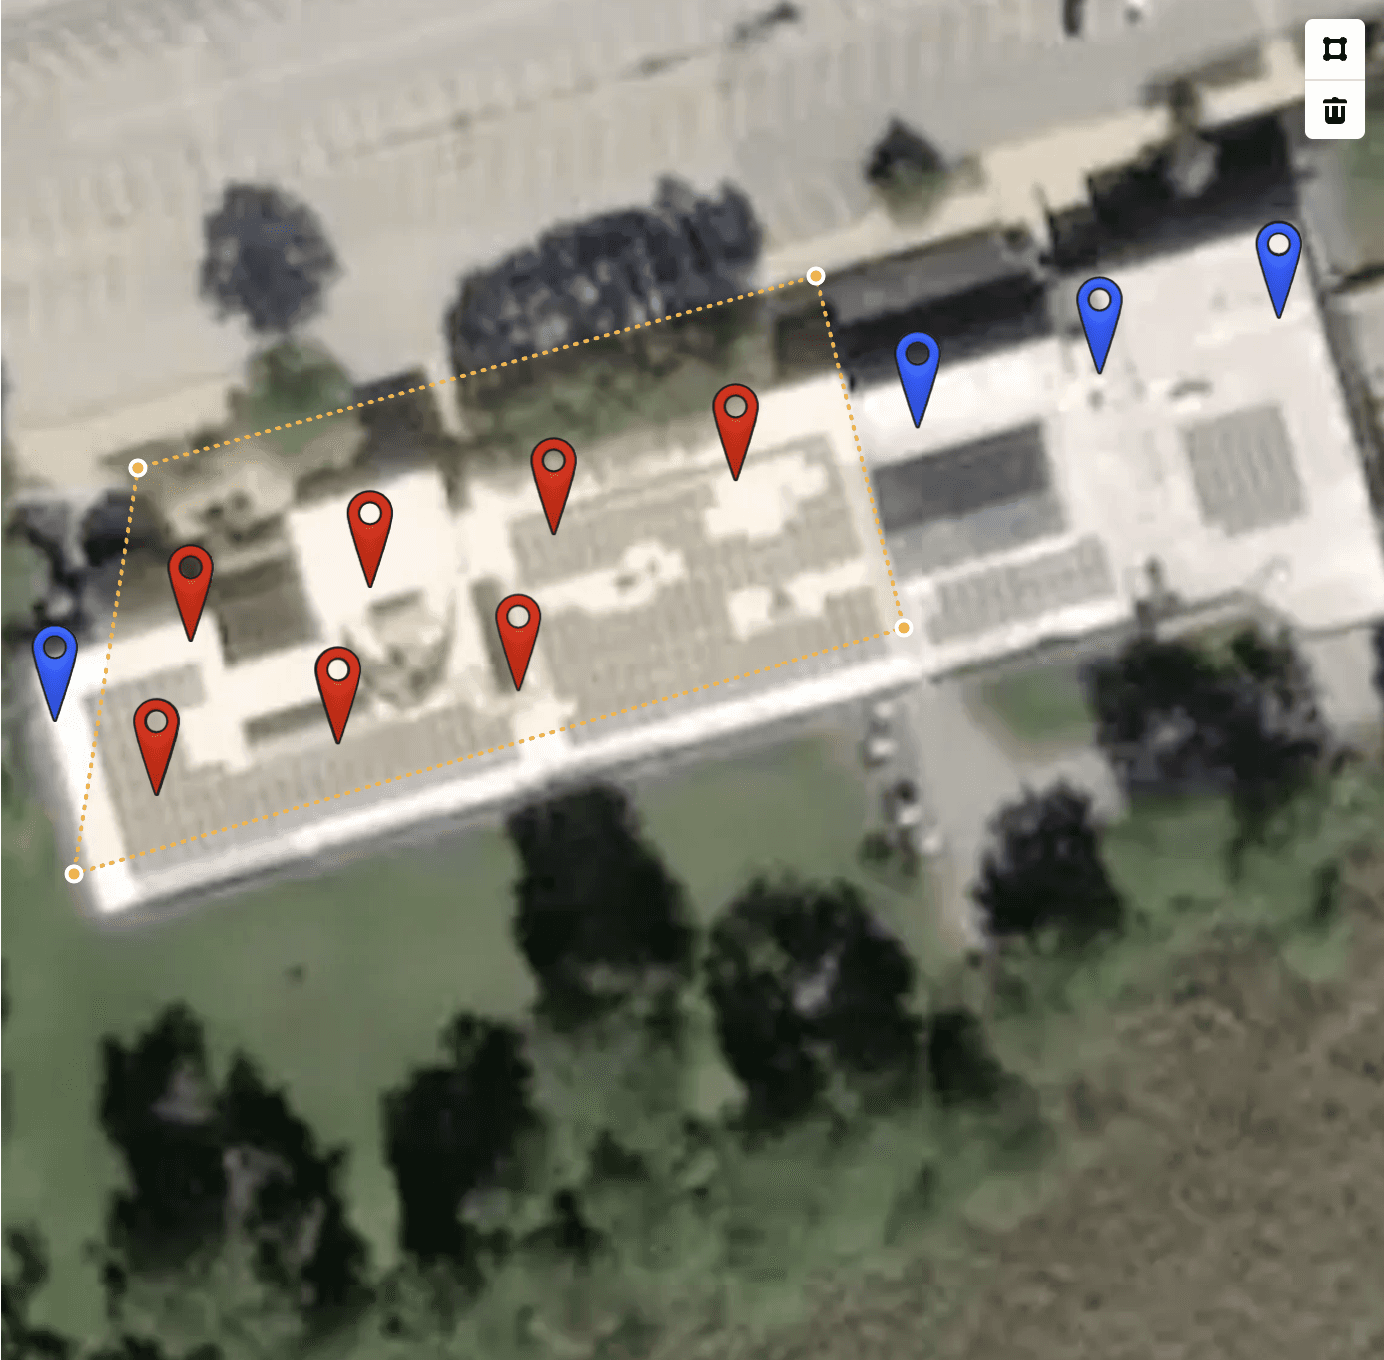
You can use the polygon tool on the map to select a subset of images to submit.
Unselected pins will show as Blue and will be excluded from processing. See some guidelines about selecting images here.
Add Upload metadata
Name: This name is important as it appears in the order status page while the processing is ongoing. This name is also the title given to the orthomosaic visible in the inspection report.
Mount Type: Select the Mount Type for the site (Rooftop, Carport, or Ground Mount) to ensure optimal processing of images.
Irradiance: This is necessary to calculate the normalized Delta T information for the detected anomalies. If irradiance is not measured at the time of inspection, the report will not contain normalized values. Note that Instant Inspections require an irradiance of at least 600 for image processing.
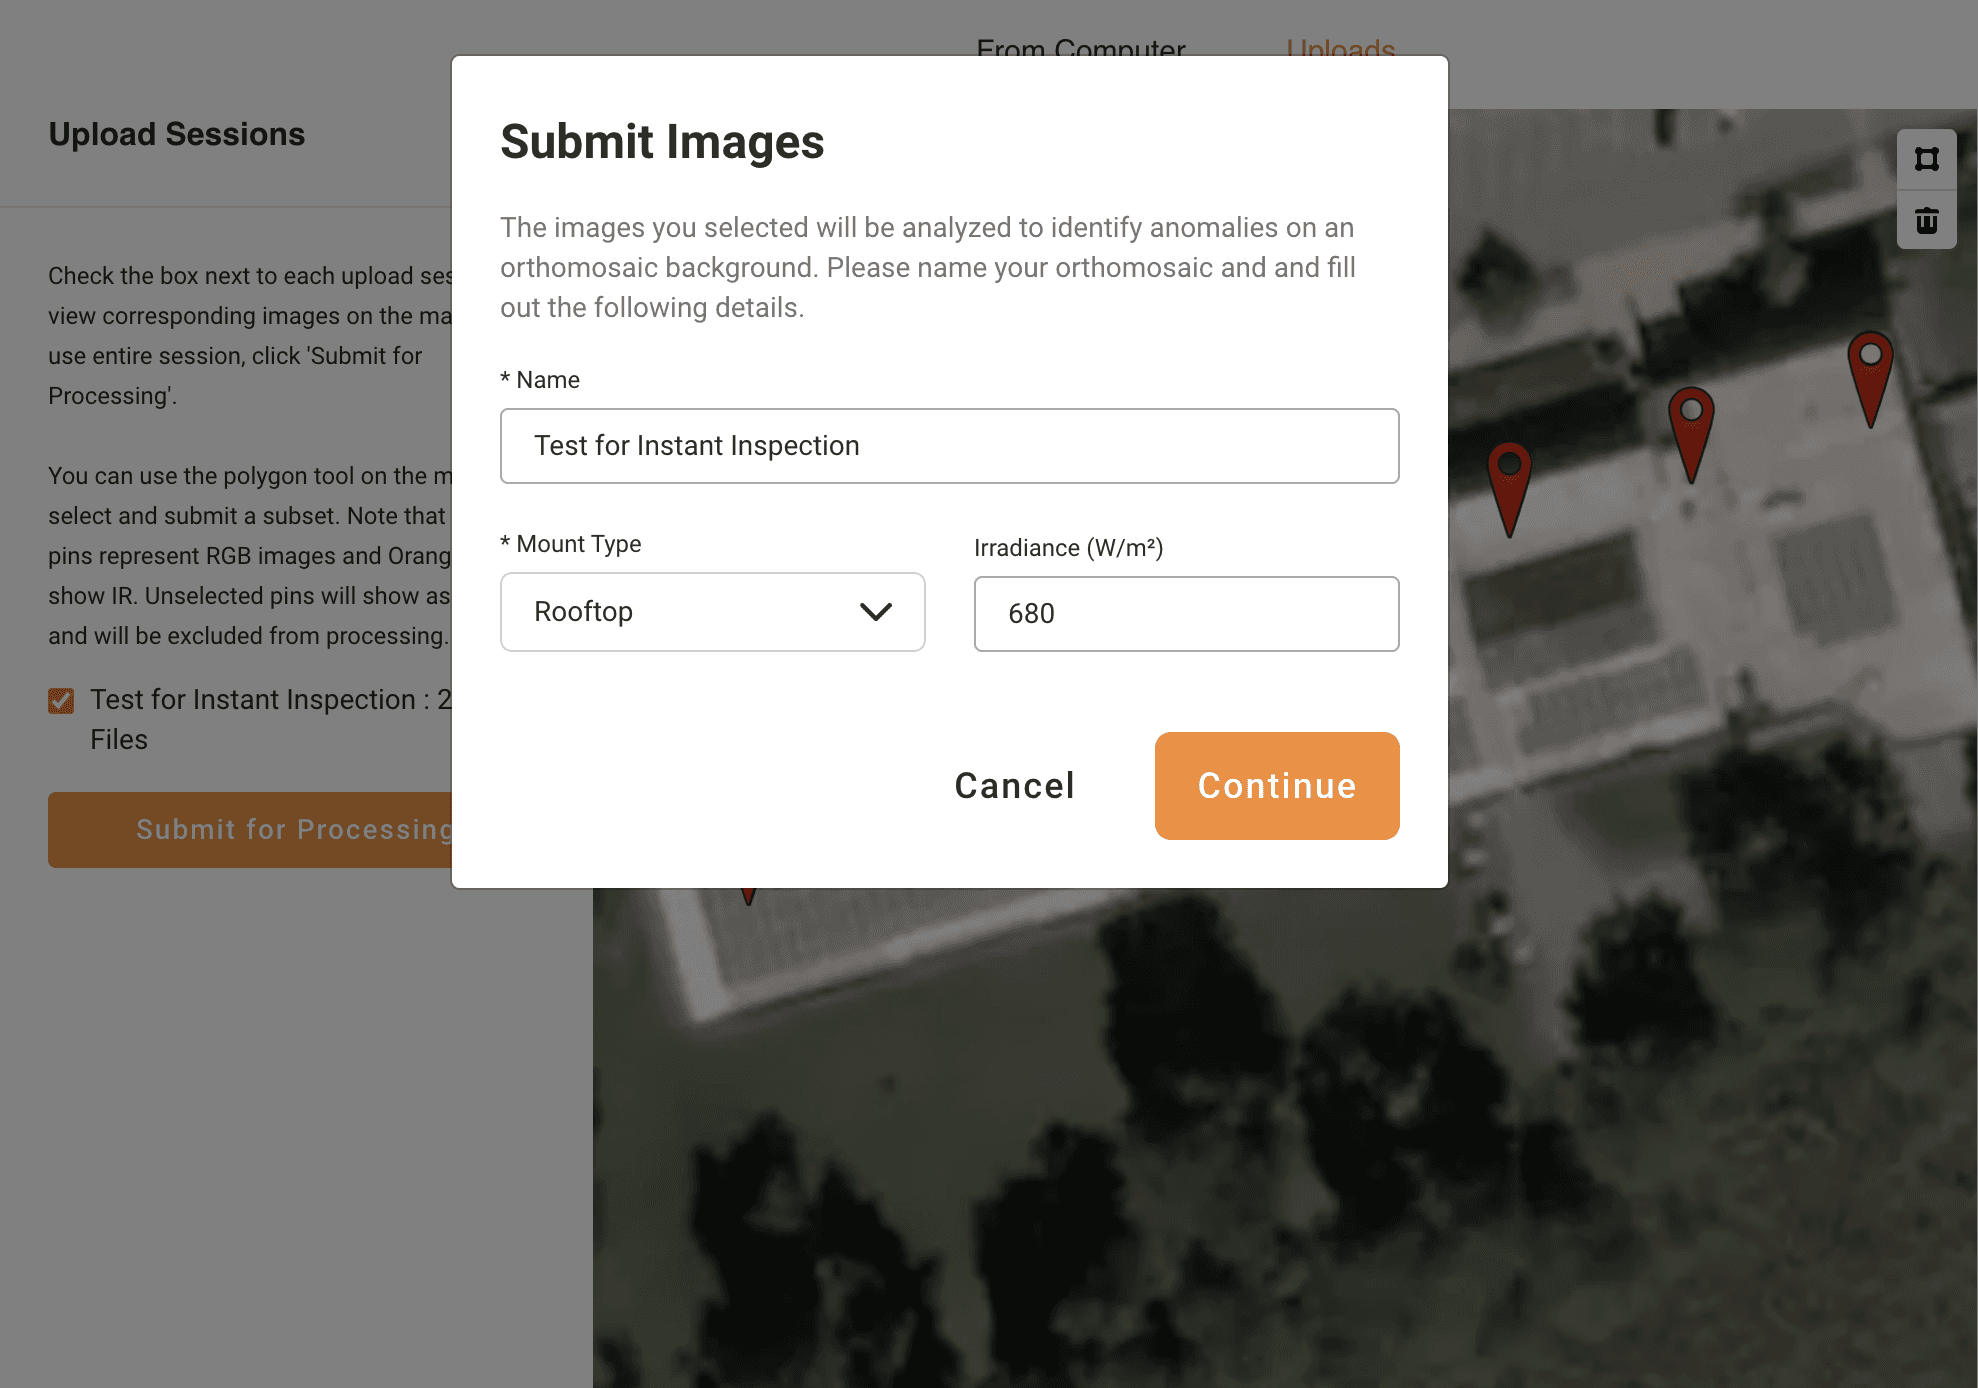
Click Continue
Click Process Data

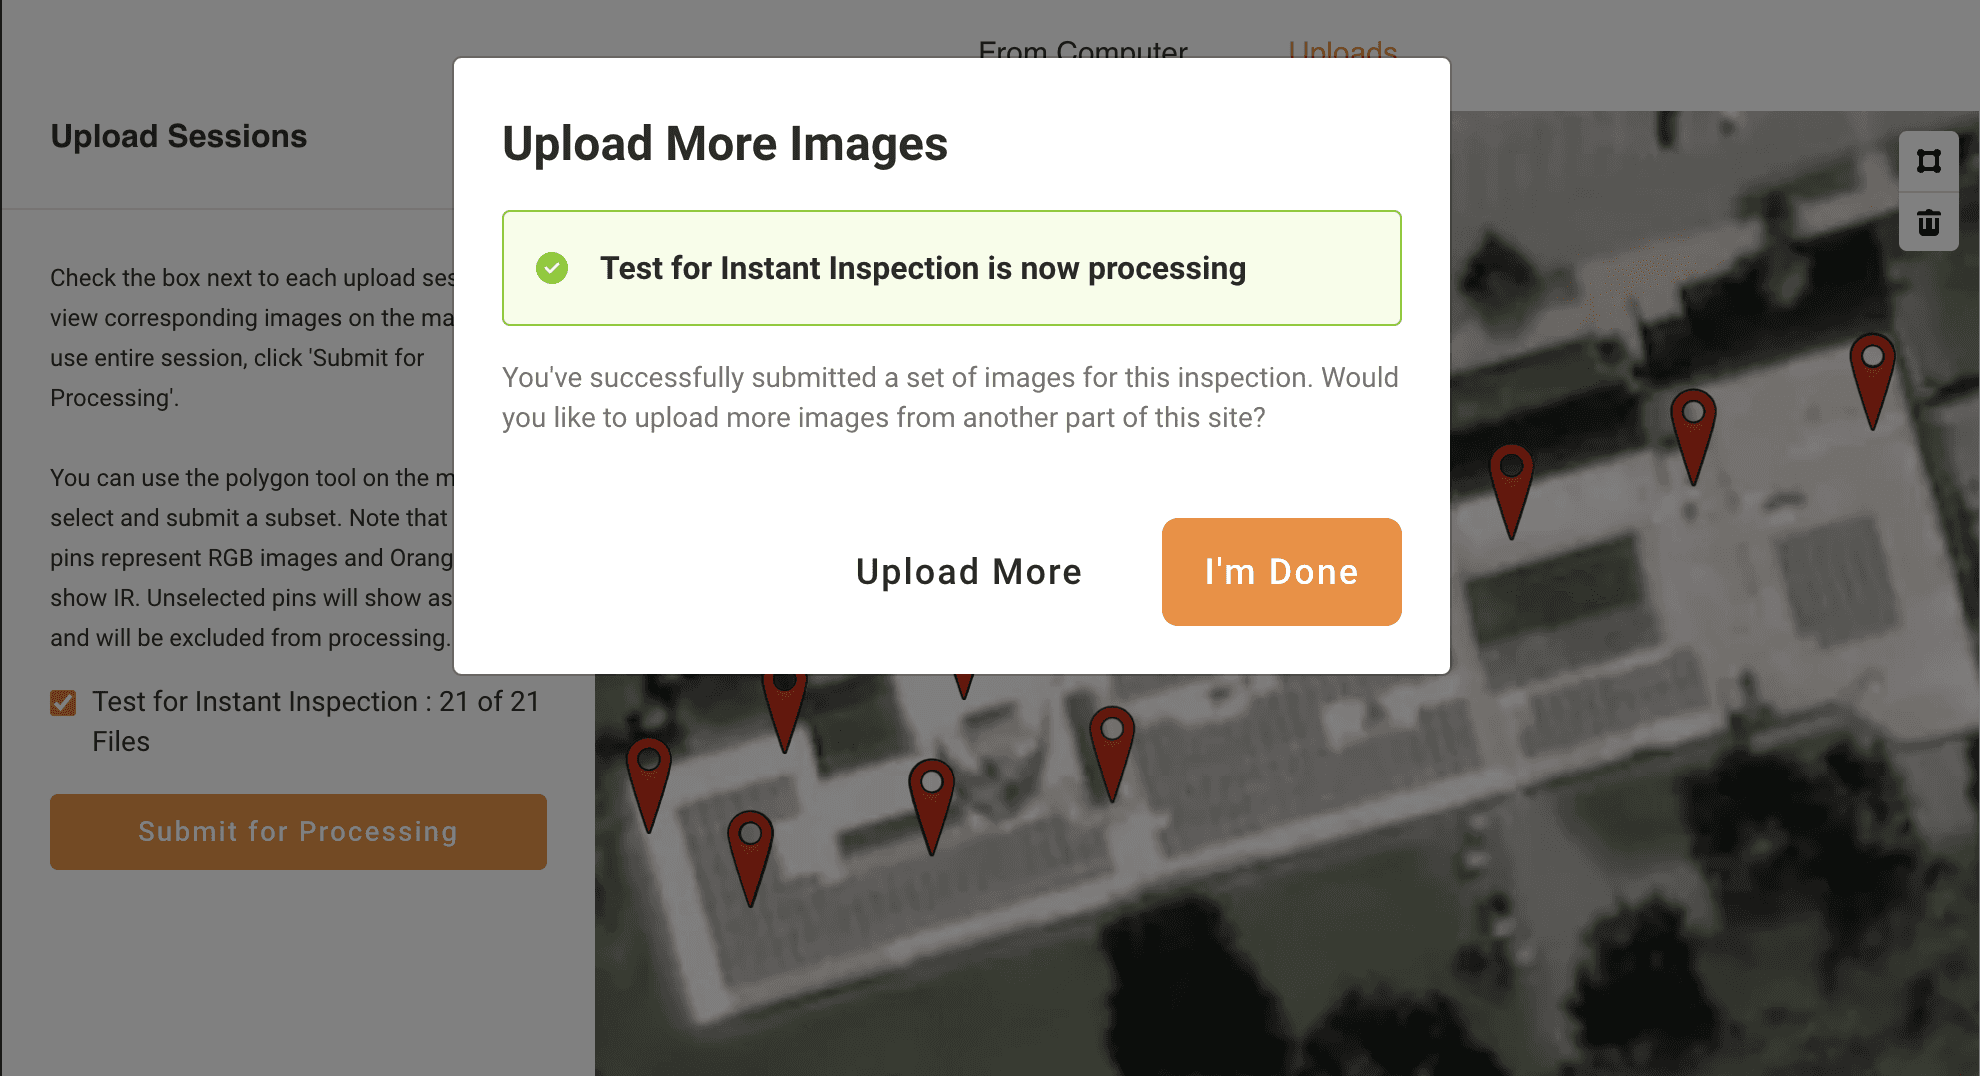
[Optional] Step 4: Upload more images
You have now submitted one image set for Instant Inspection processing. You can continue with another Image Set (e.g. a different rooftop or a carport, or a separate ground mount section).
Click on "Upload More" in the next pop-up, and repeat the process starting at Step 2.
Otherwise, click on "I’m Done" and you will taken to the Order Status page where you can track the progress of your Instant Inspection.